
As mentioned in my canning green beans post, next on the list was tomatoes. If you made it through the green beans, I promise you will do just fine with tomatoes! Tomatoes can be canned multiple ways; this post will focus on smooth, flavorful tomato juice, but open kettle canning is another option and provides you with juice containing chunks of tomatoes throughout, yum! This past weekend I was home not only for another canning session, but also to celebrate my Grandma’s birthday. The whole family went out for a delicious Italian dinner the day before and we had our canning session on her actual birthday; it was really nice to spend time together making her birthday even more memorable. These days we have together are about much more than just cooking, baking or canning; the time is priceless and stories that undoubtedly come up are the best. I love listening to stories from back in the day as much as I love flipping through the photos to match. Until Sunday, I had no idea my dear Grandpa not only knew how to can tomatoes start to finish, but also used to do it along side my Grandma and even completed the process for her after having one of their three children. At first I was surprised to hear about them canning together in the evenings (20-24 quarts at a time!) as their neighbors stopped by to visit and watch, but thinking about it more it kind of sounds just like my Grandpa. 🙂
As with the green beans, I tried my best to take photos throughout the morning to be able to include another step by step process for all of you (and who are we kidding, for me to reference when I attempt this on my own!). So let’s get started!
Canning Tomato Juice
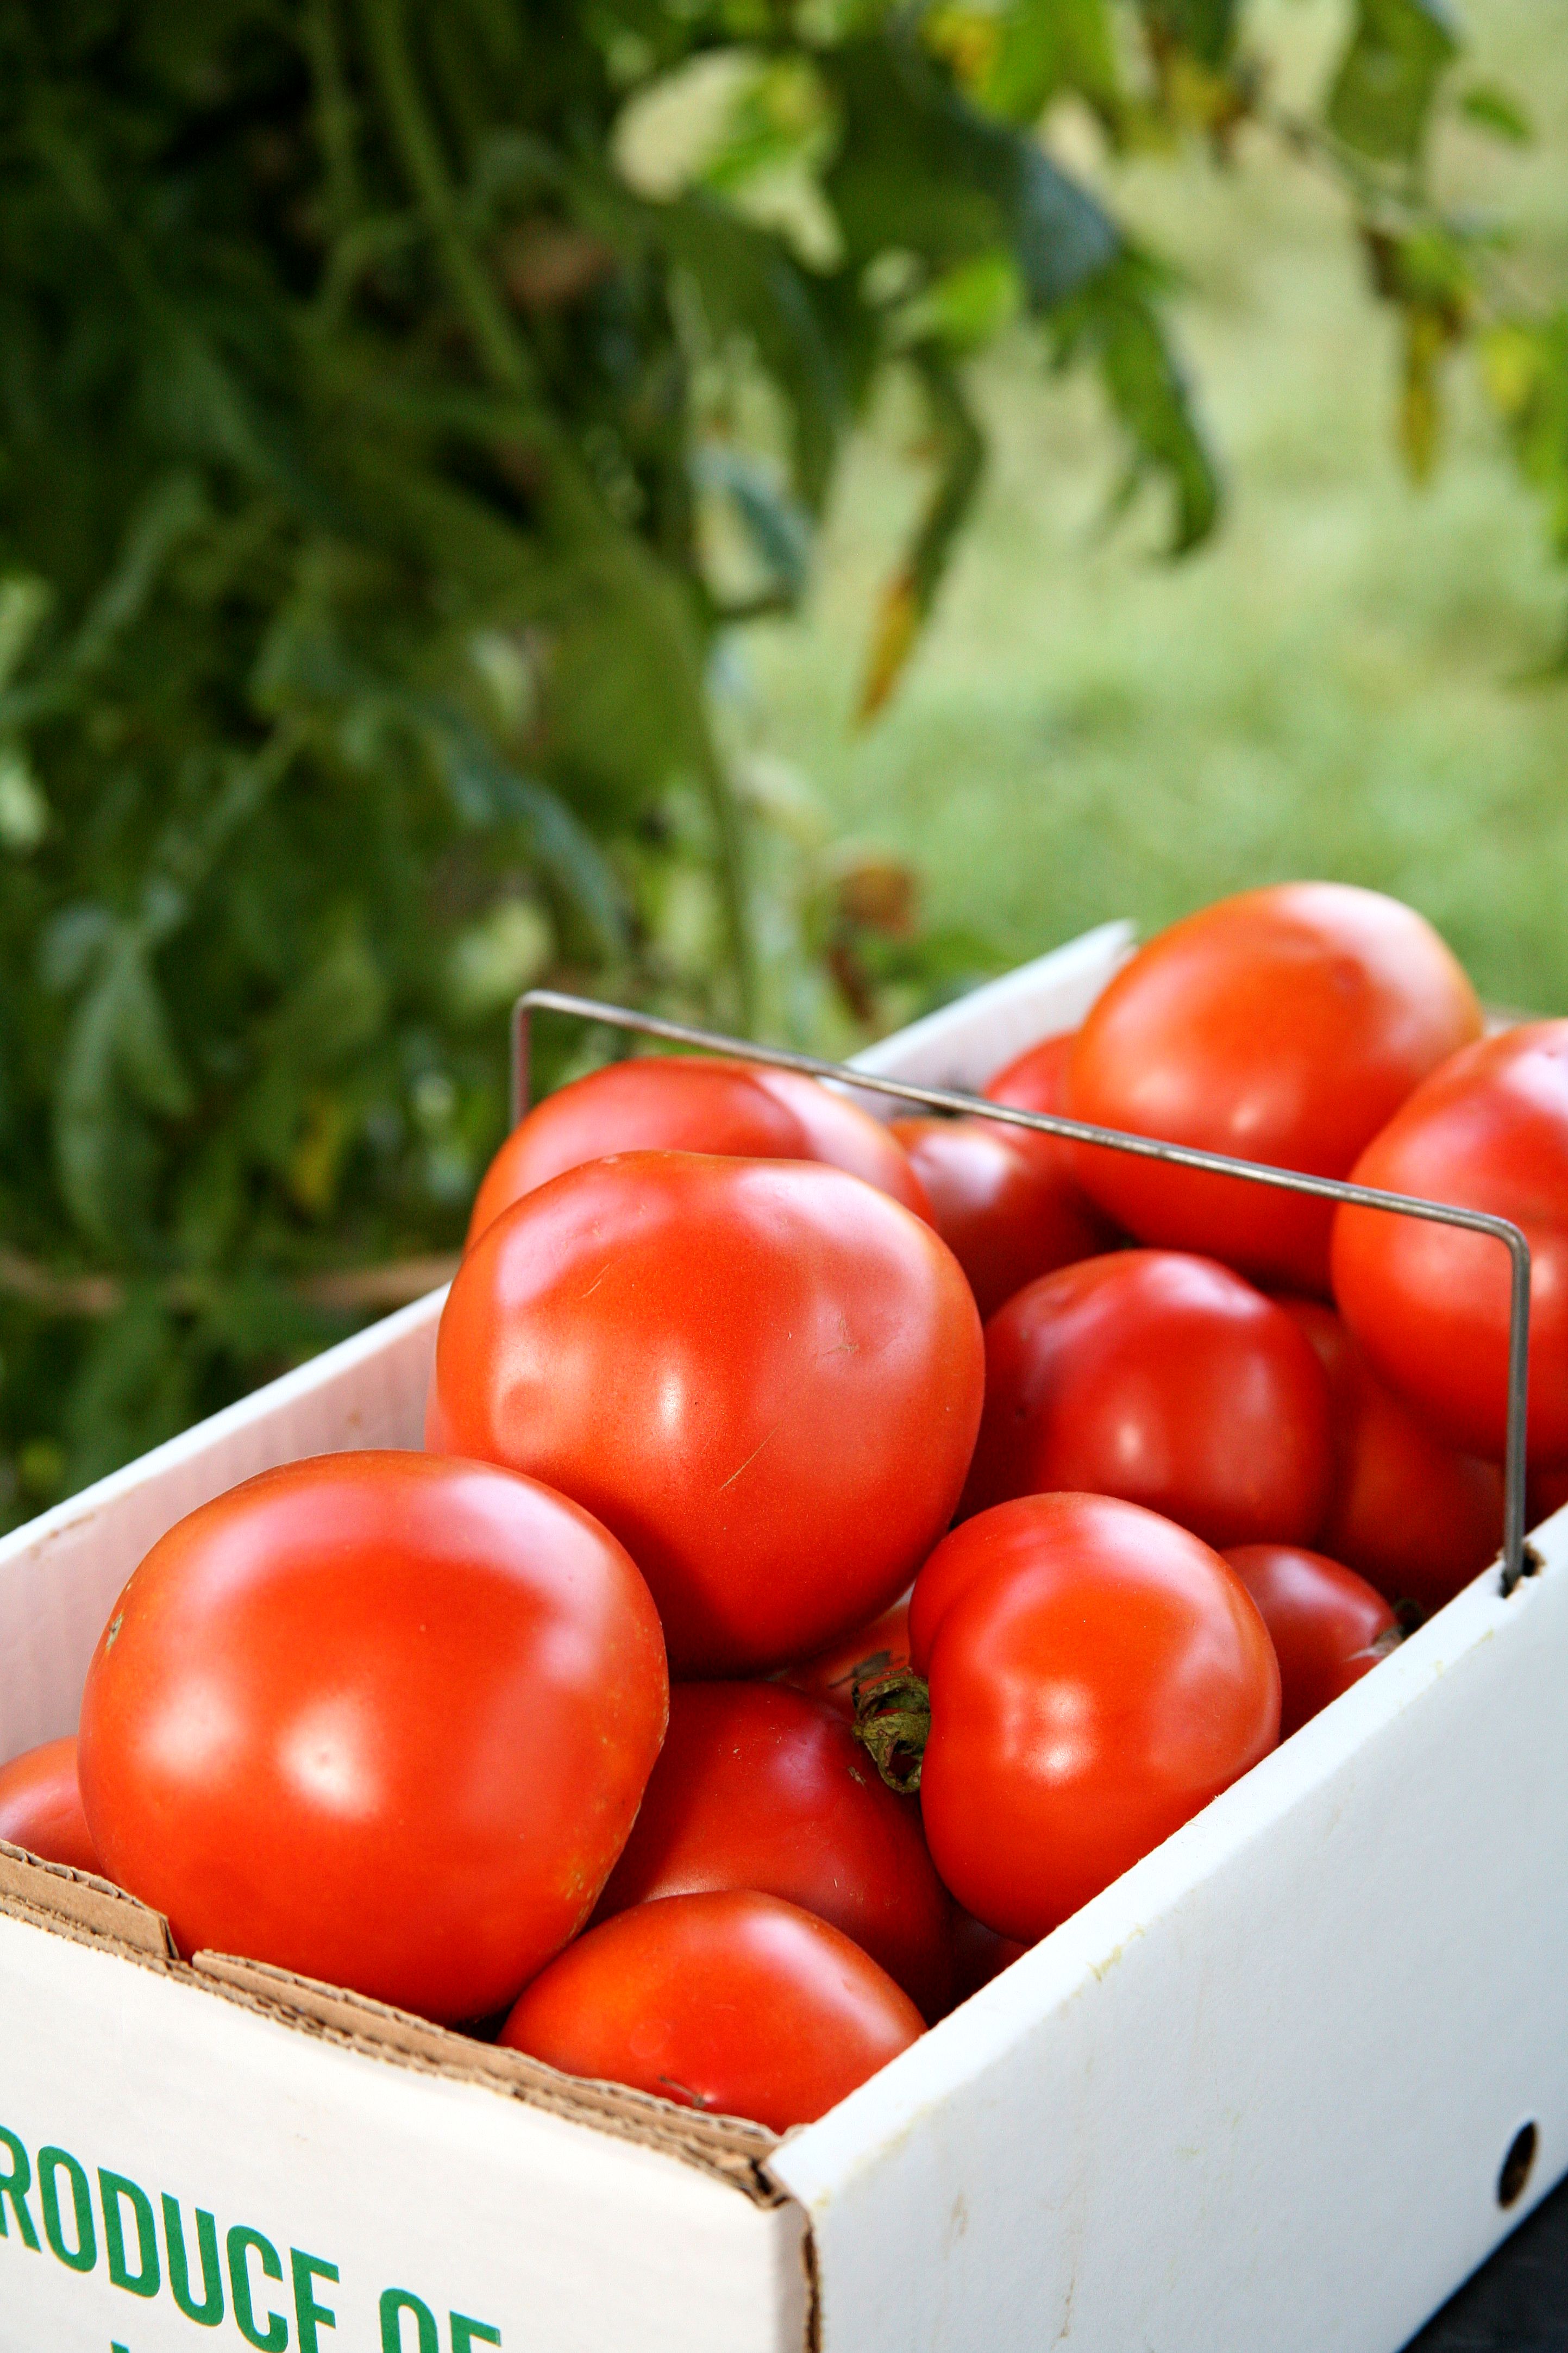
If you’re lucky enough to have tomatoes growing in your own garden, collect the ripe ones when you have plenty ready to be picked and begin your prep work with a rinse or soak of the tomatoes. If you don’t have fortunate access to a garden, try buying your tomatoes from a local farmer’s market for best quality and taste!

Next, begin slicing your tomatoes and adding them to a large kettle. This part can be a tad time consuming, but as I’ve witnessed by my Grandma you will get much faster as the years go by! If you slice the tomato in half, cut out the core and continue slicing from there it becomes a fairly smooth process! Once all tomatoes are sliced, add your kettle to the stove allowing your tomatoes to reach a rolling boil. Cook for one and a half hours, stirring occasionally, and enjoy the aroma filling your kitchen! Stirring will become much easier as the tomatoes cook.

Mmm…I can remember the scent of the kitchen as I post these photos! Once your tomatoes are cooked, carefully remove the kettle from the stove and set it on a heat resistant surface next to your sink. You’ll want a medium sized pot and a strainer with a stand sitting in your sink.
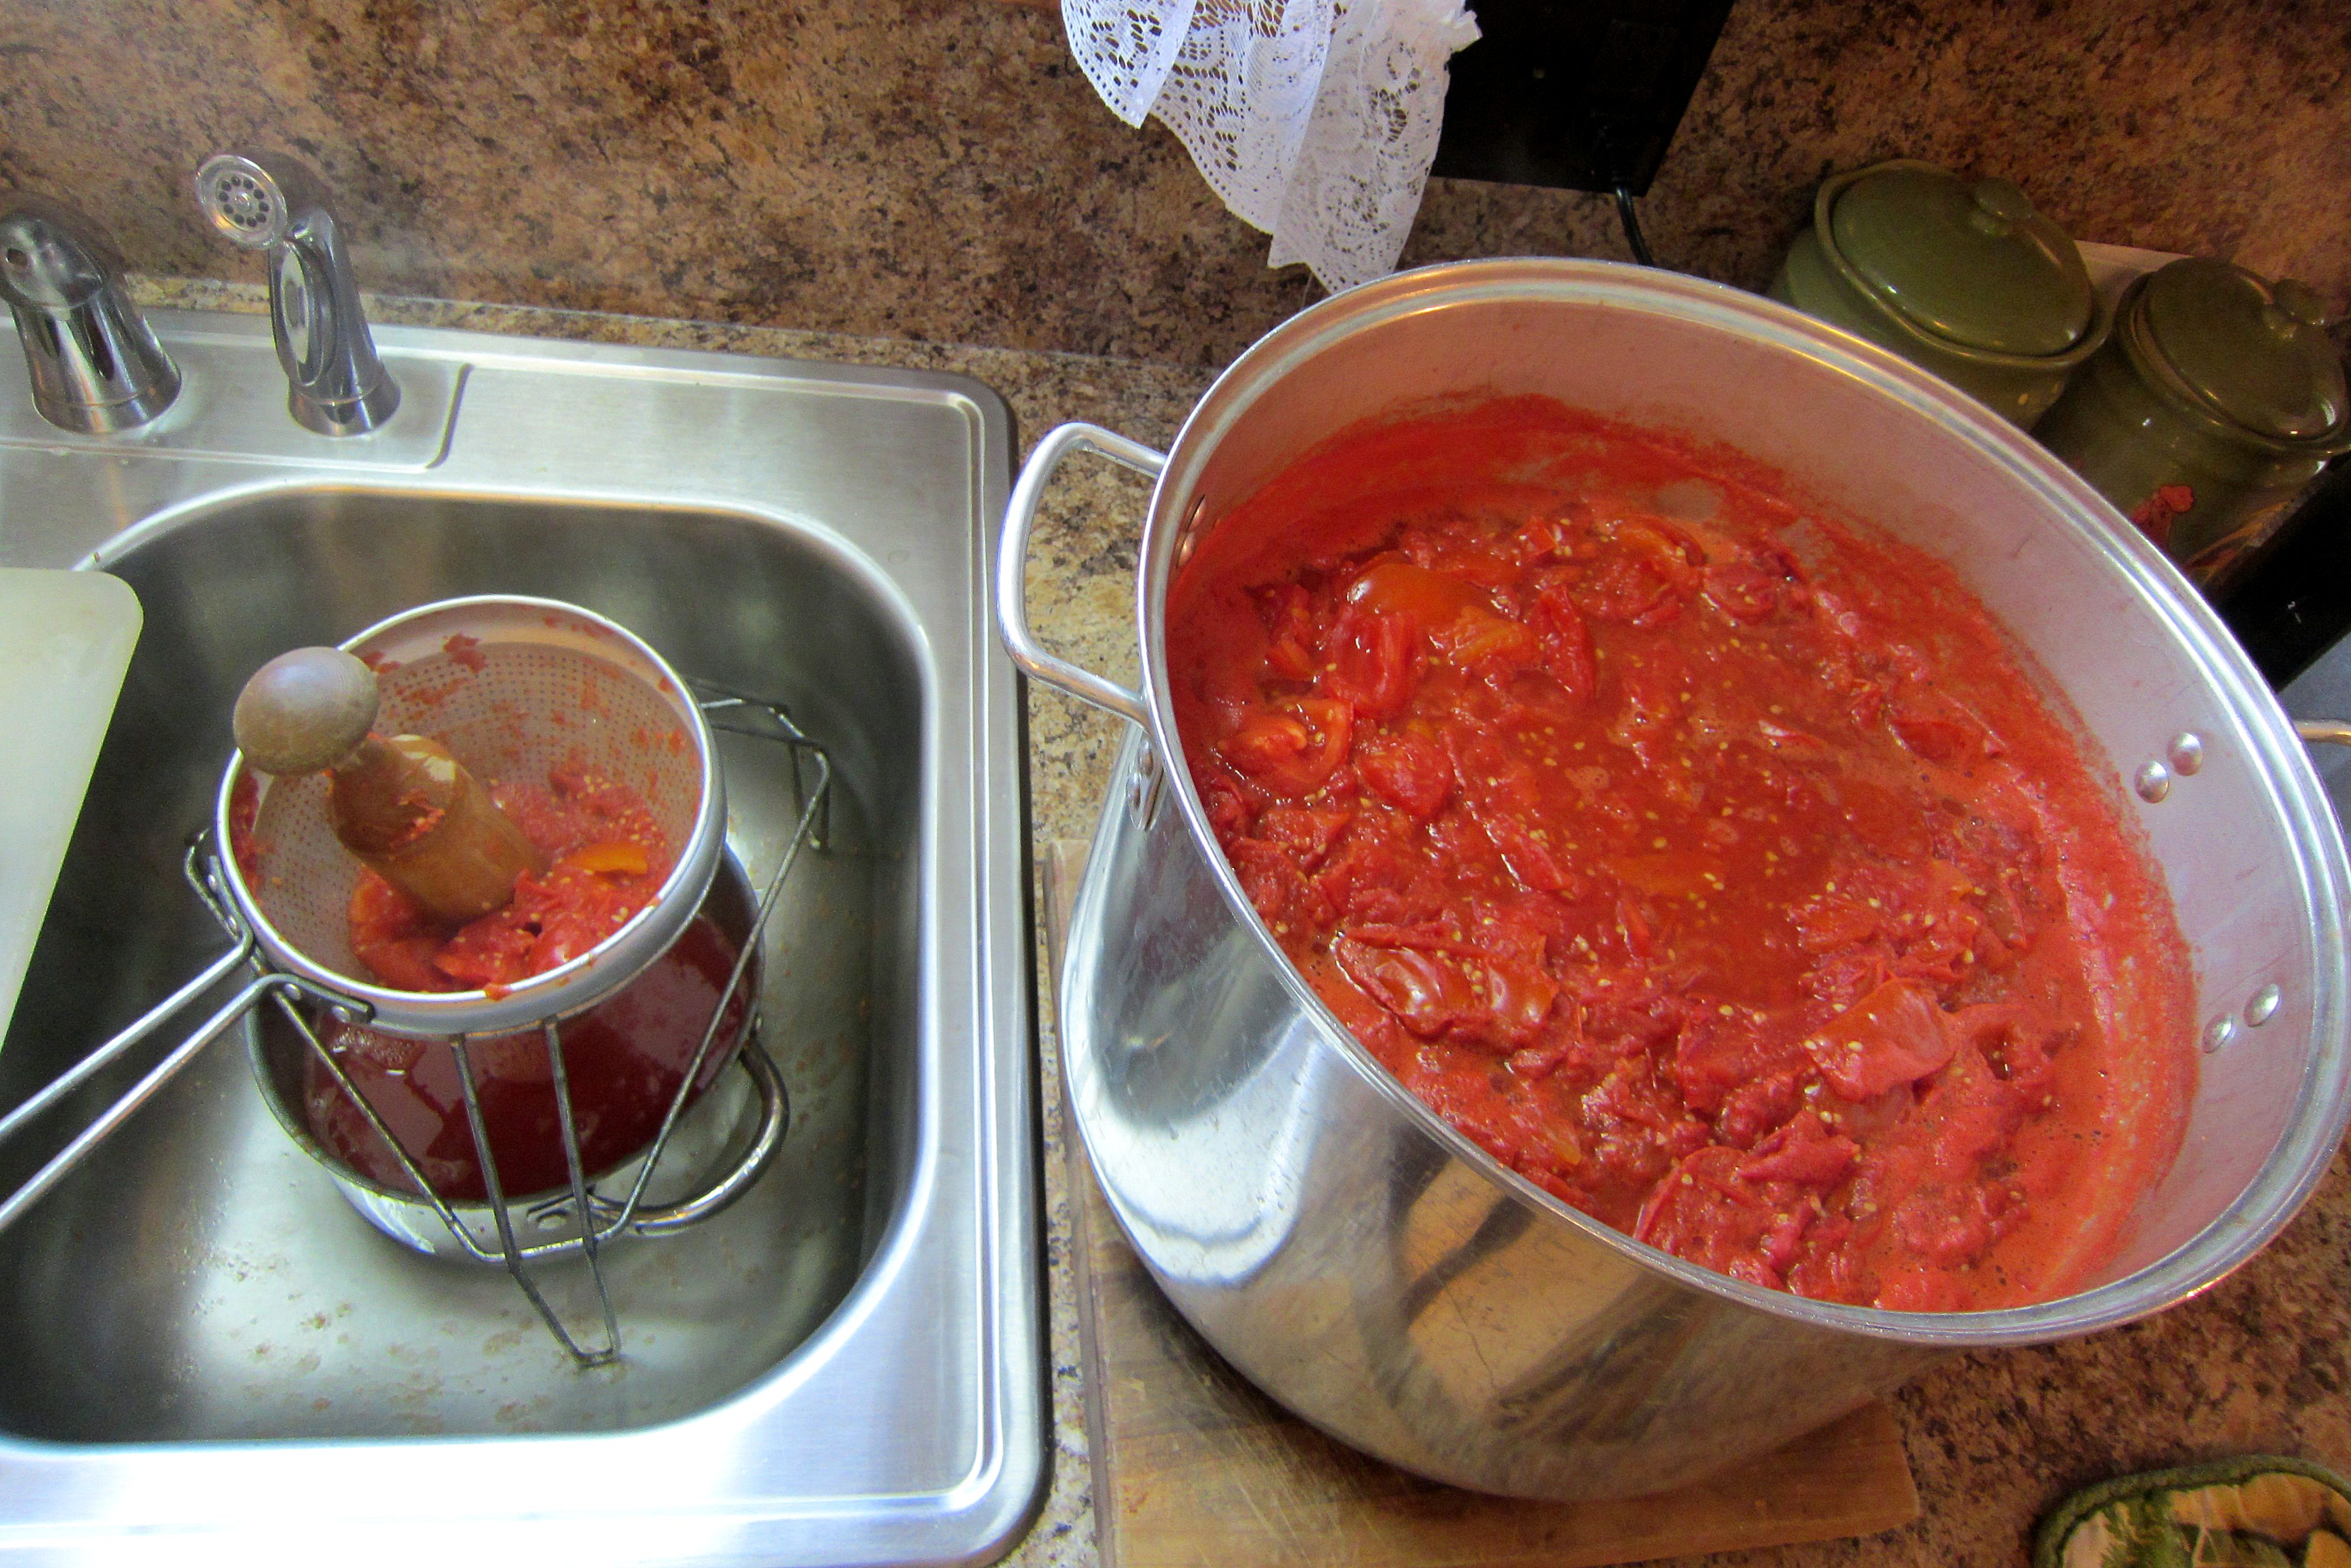
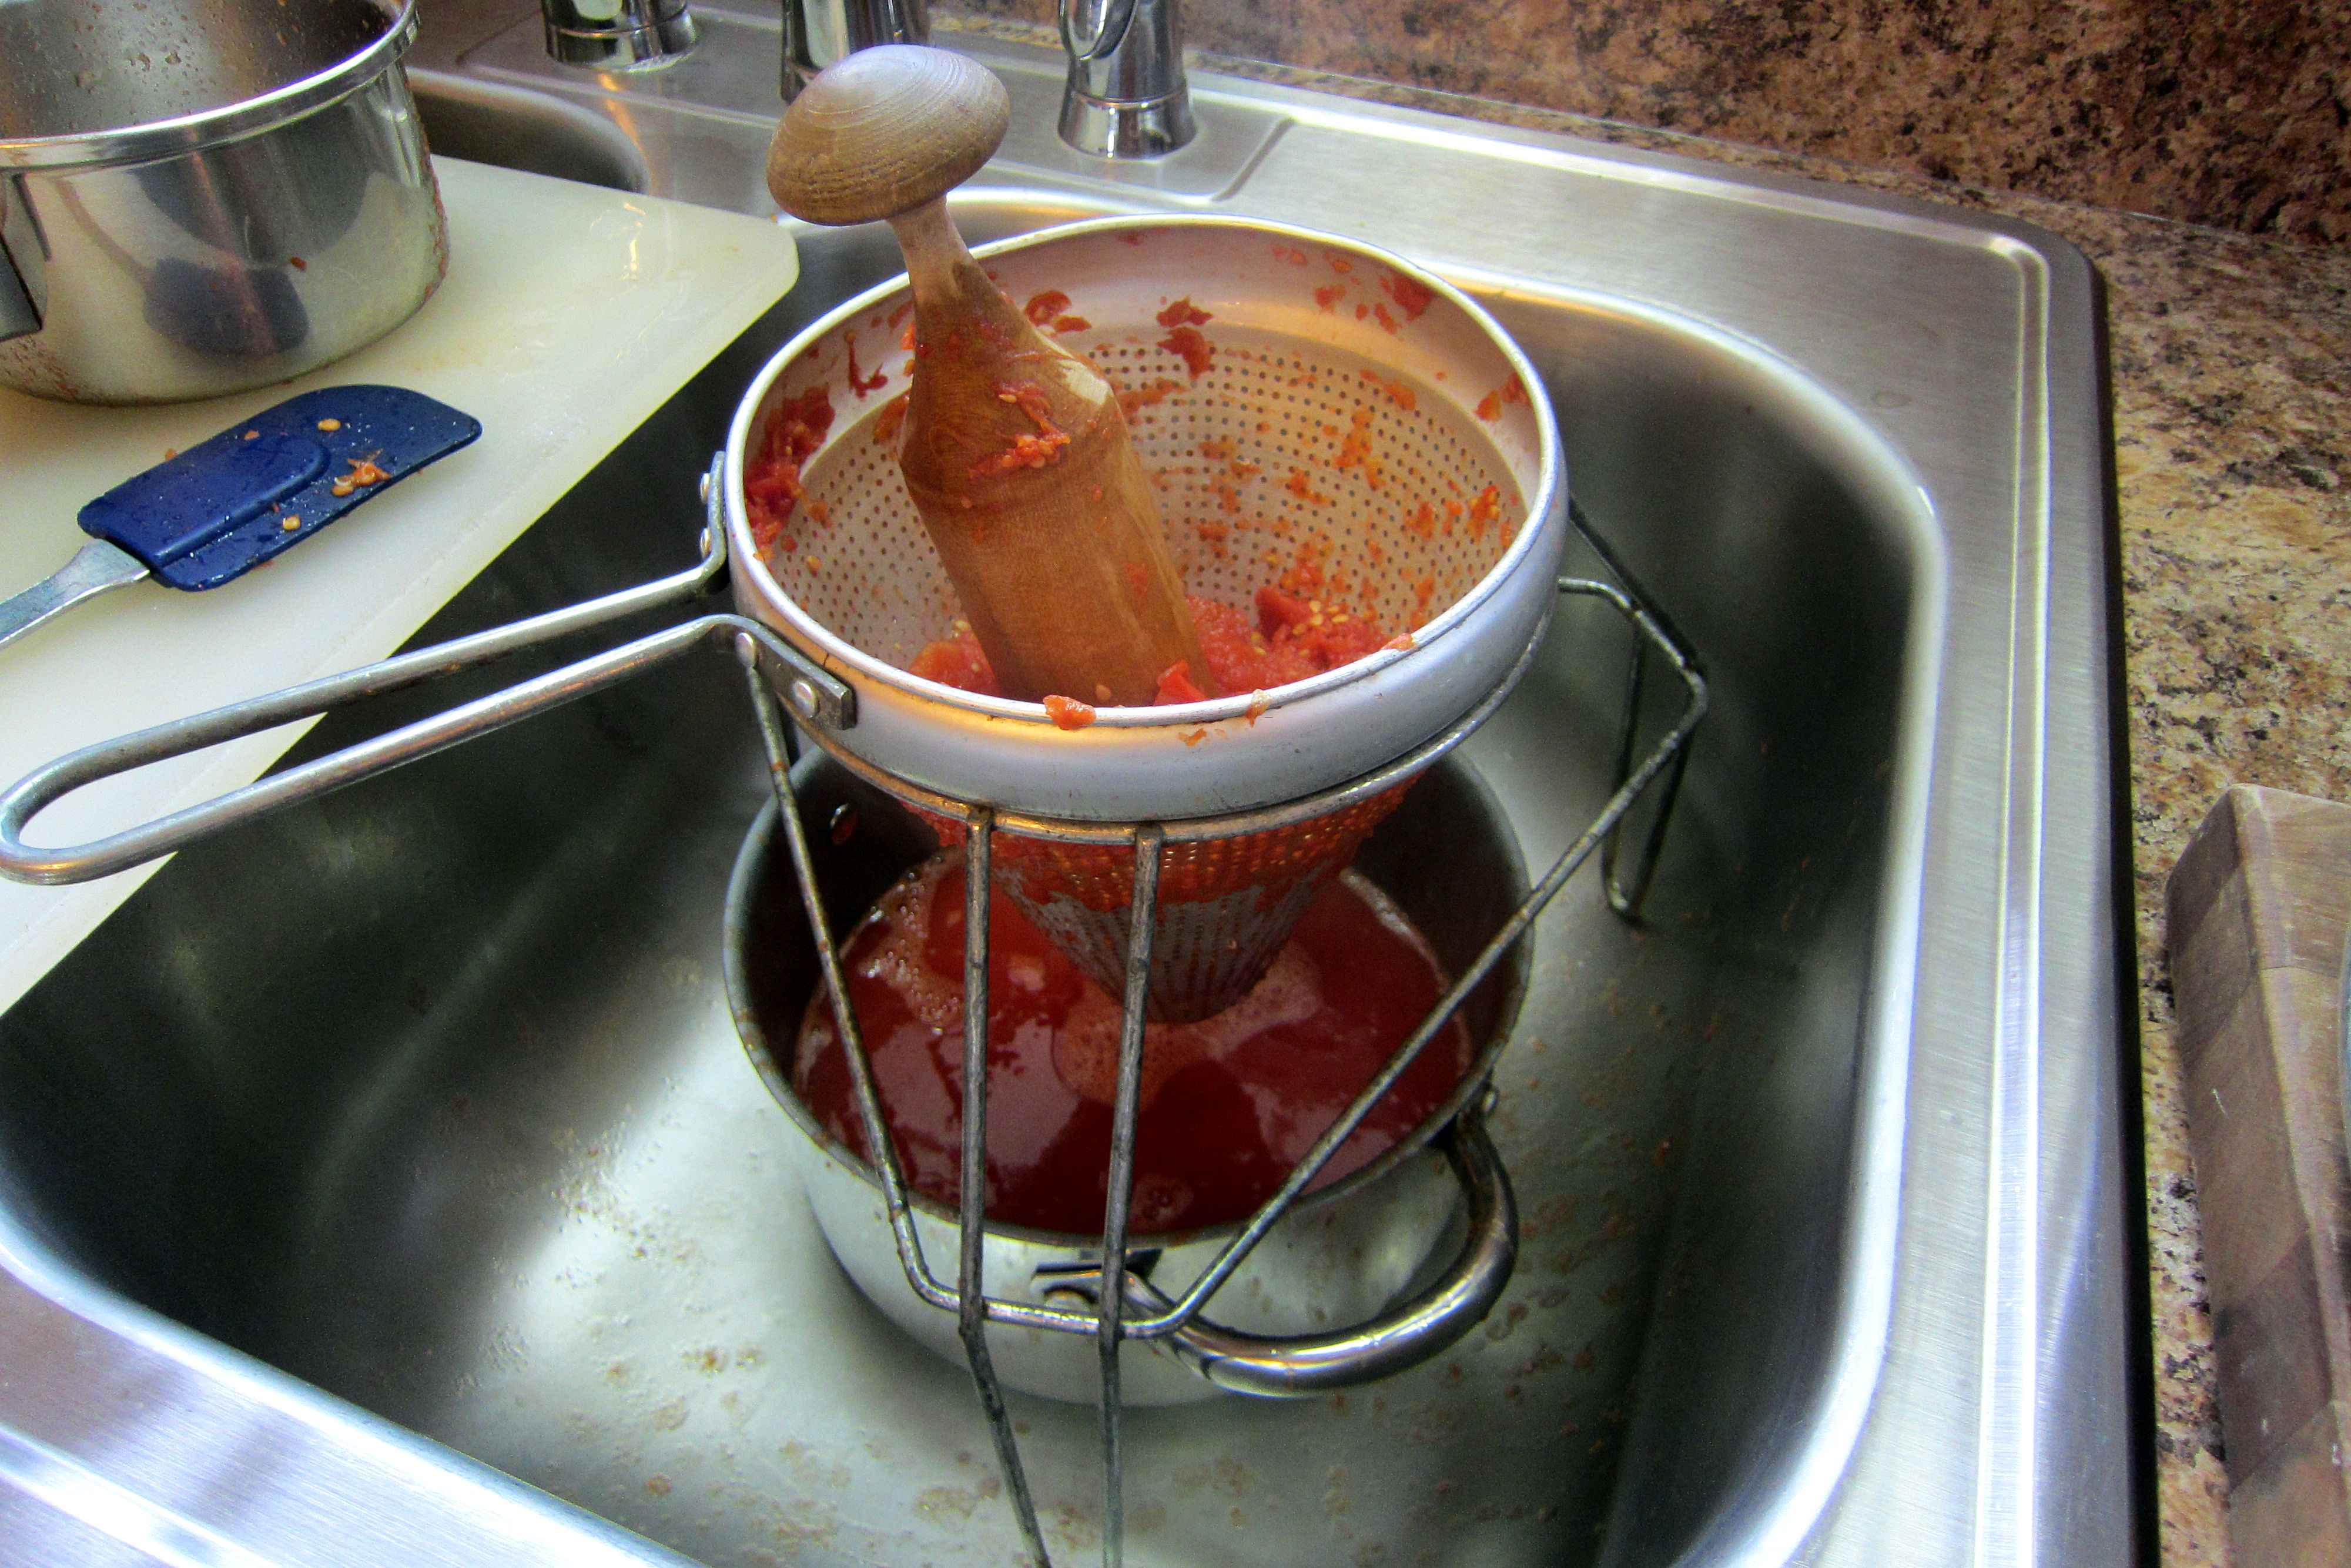
The set up pictured is similar to that of a mortar and pestle like you’d use for mashing and grinding herbs, seeds, etc; in this case, we want the pestle to strain to create the smooth tomato juice. Add a small amount of cooked tomatoes to the strainer and take the mortar around clockwise to squeeze out all the juice. Rather than holding the mortar, keep it in the palm of your hand as you go around and around. As the tomato inside begins to dry out, mash as needed to get your last bit of juice and scrape the excess scraps off the mortar into a bowl.
See that small saucepan in the photo below? That’s what we used to pour the cooked tomatoes into the strainer; it’s an impressive 54 years old, a wedding gift to my grandparents that still gets used today! Oh, and the strainer belonged to my Grandma’s Mother. I love that.
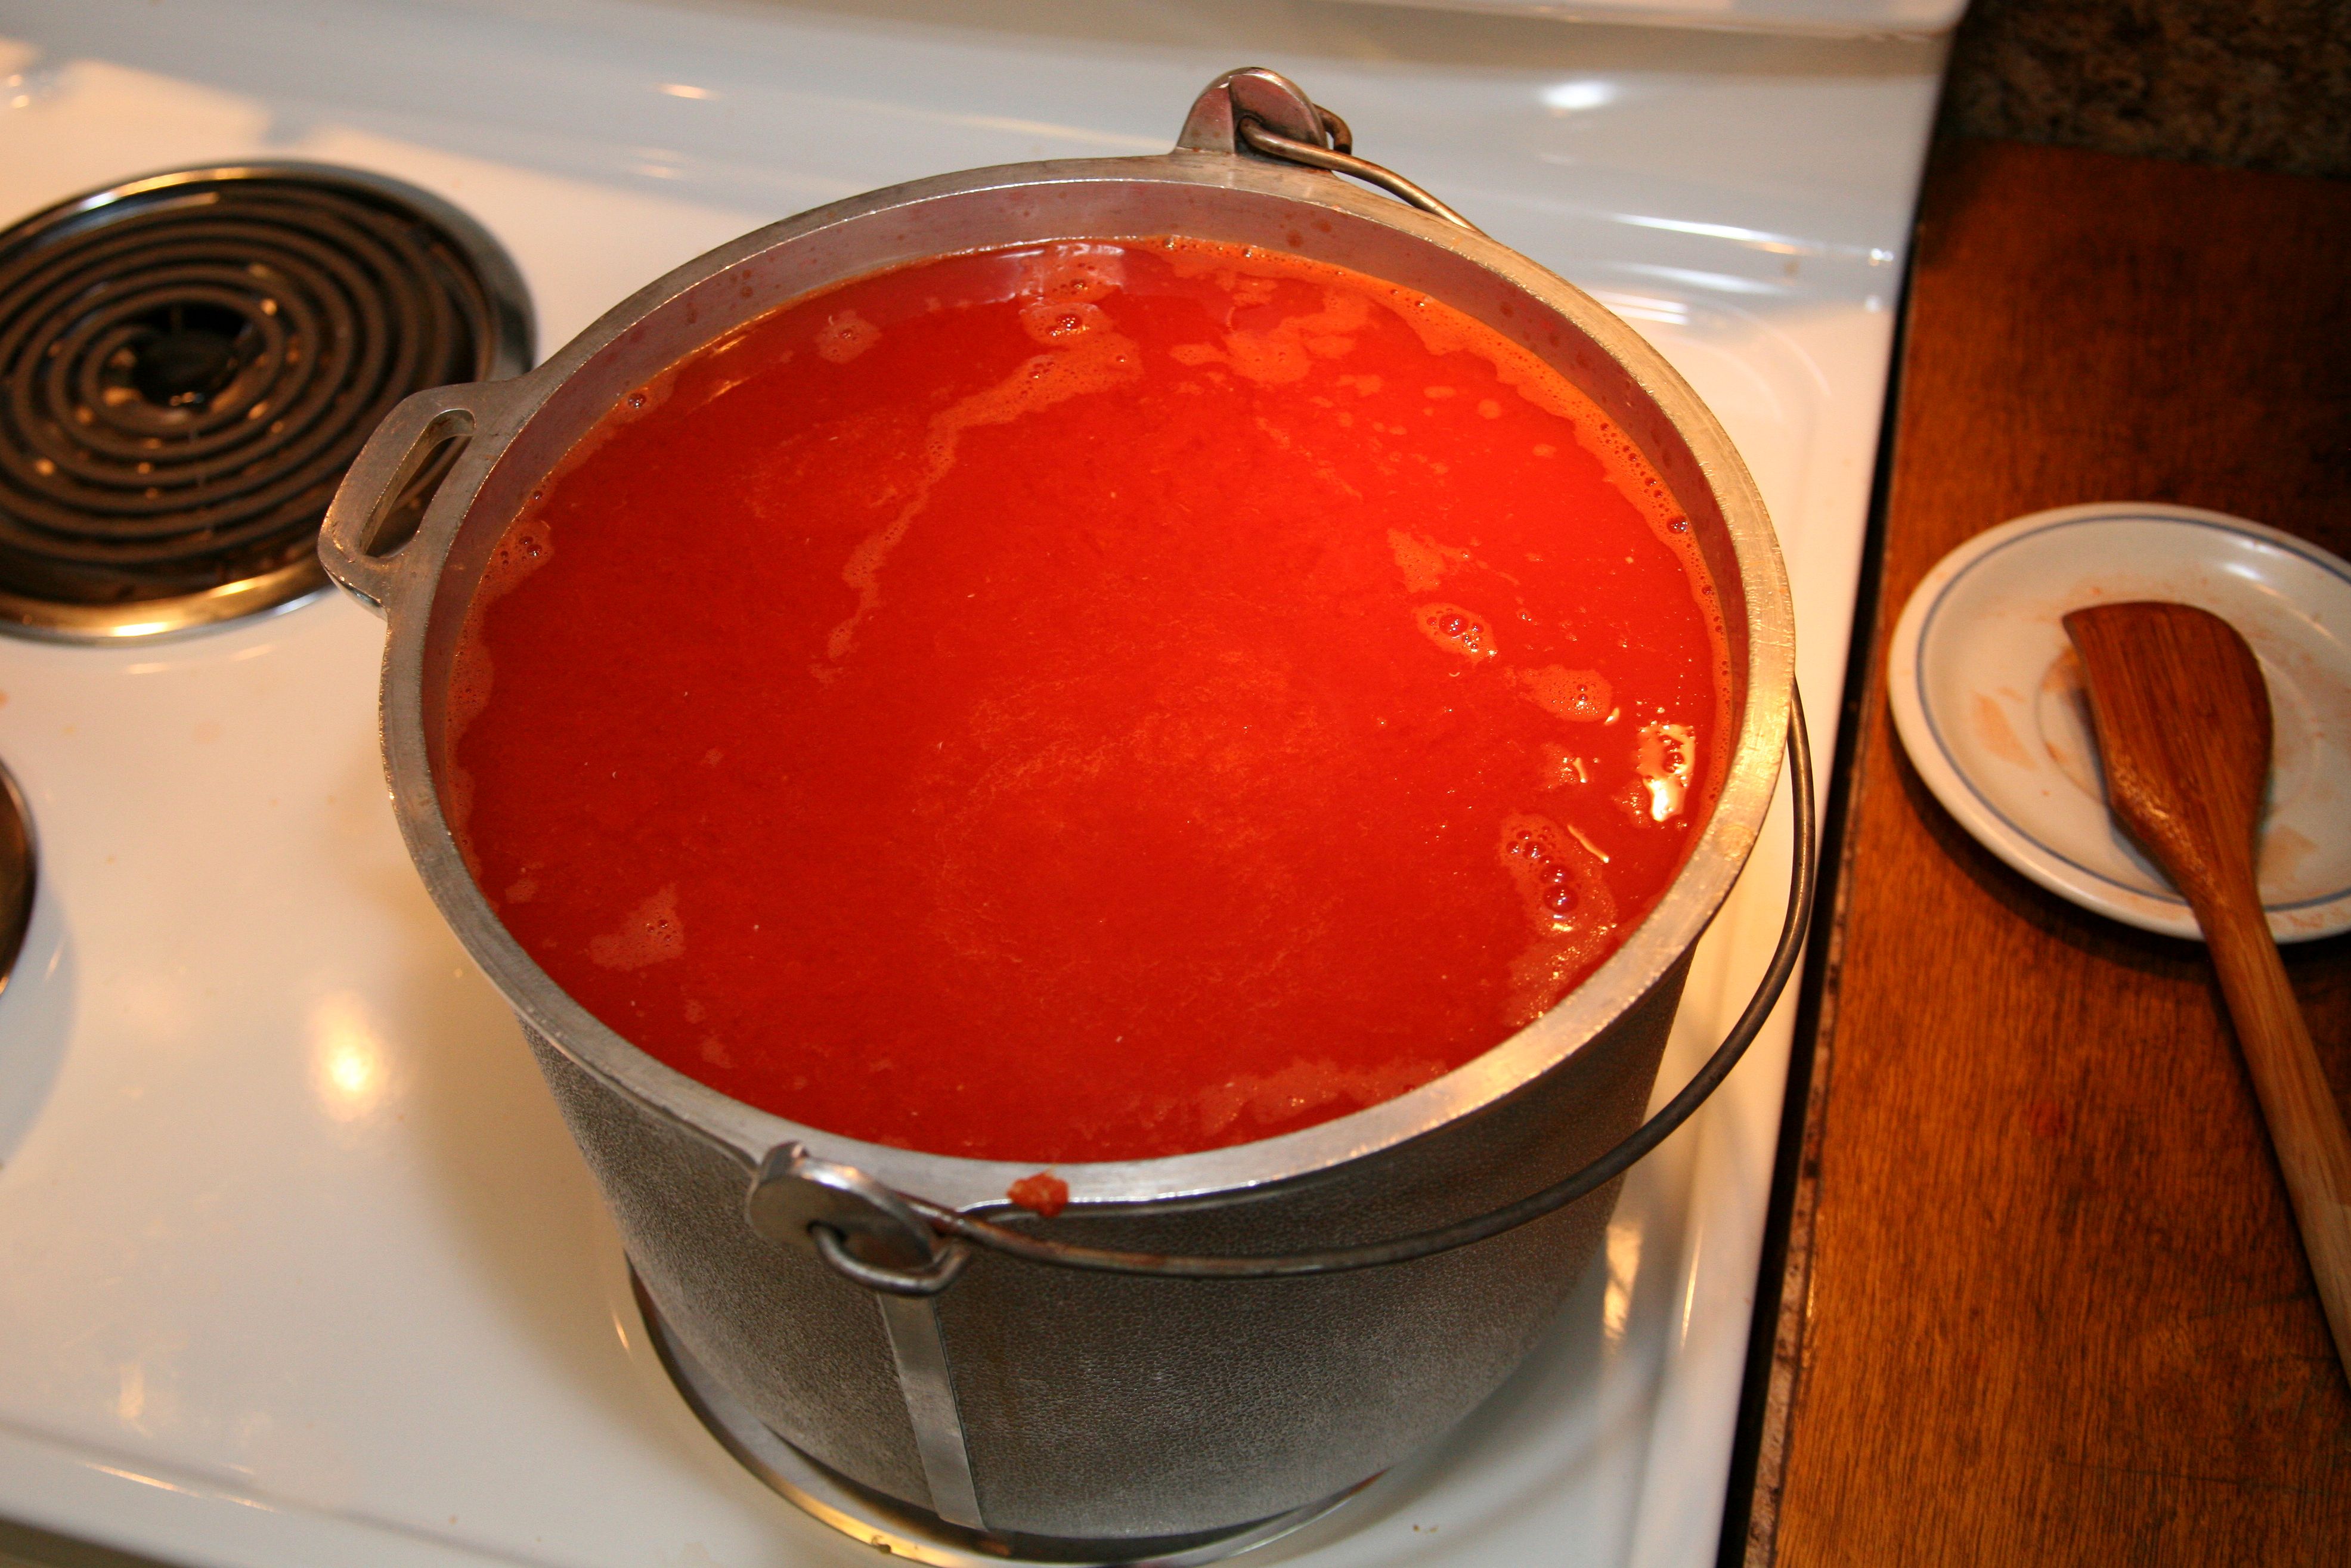
Once your medium sized pot in the sink is full, pour the juice into a new large pot on the stove over high heat. Repeat the straining process until all cooked tomatoes are used and added to your new pot ready for one last boil. After the tomato juice reaches a rolling boil, allow to cook for another 15 minutes, stirring occasionally.
While your juice is cooking, preheat your oven to 200 degrees and add your quart sized jars to the rack inside for sterilizing. They can remain in the oven for 10-15 minutes. At the same time, your lids can be sterilizing in a small saucepan of boiling water on the stove.

You’ve reached the homestretch! Now that your tomato juice is cooked and jars and lids are sterilized you can begin the actual canning. We got four jars out of the oven at a time to work with; use pot holders to remove them and be sure to work on a heat resistant surface. Add one teaspoon of salt to each jar, place a funnel over the mouth of the jar and begin pouring in your cooked tomato juice filling to the neck of the jar.
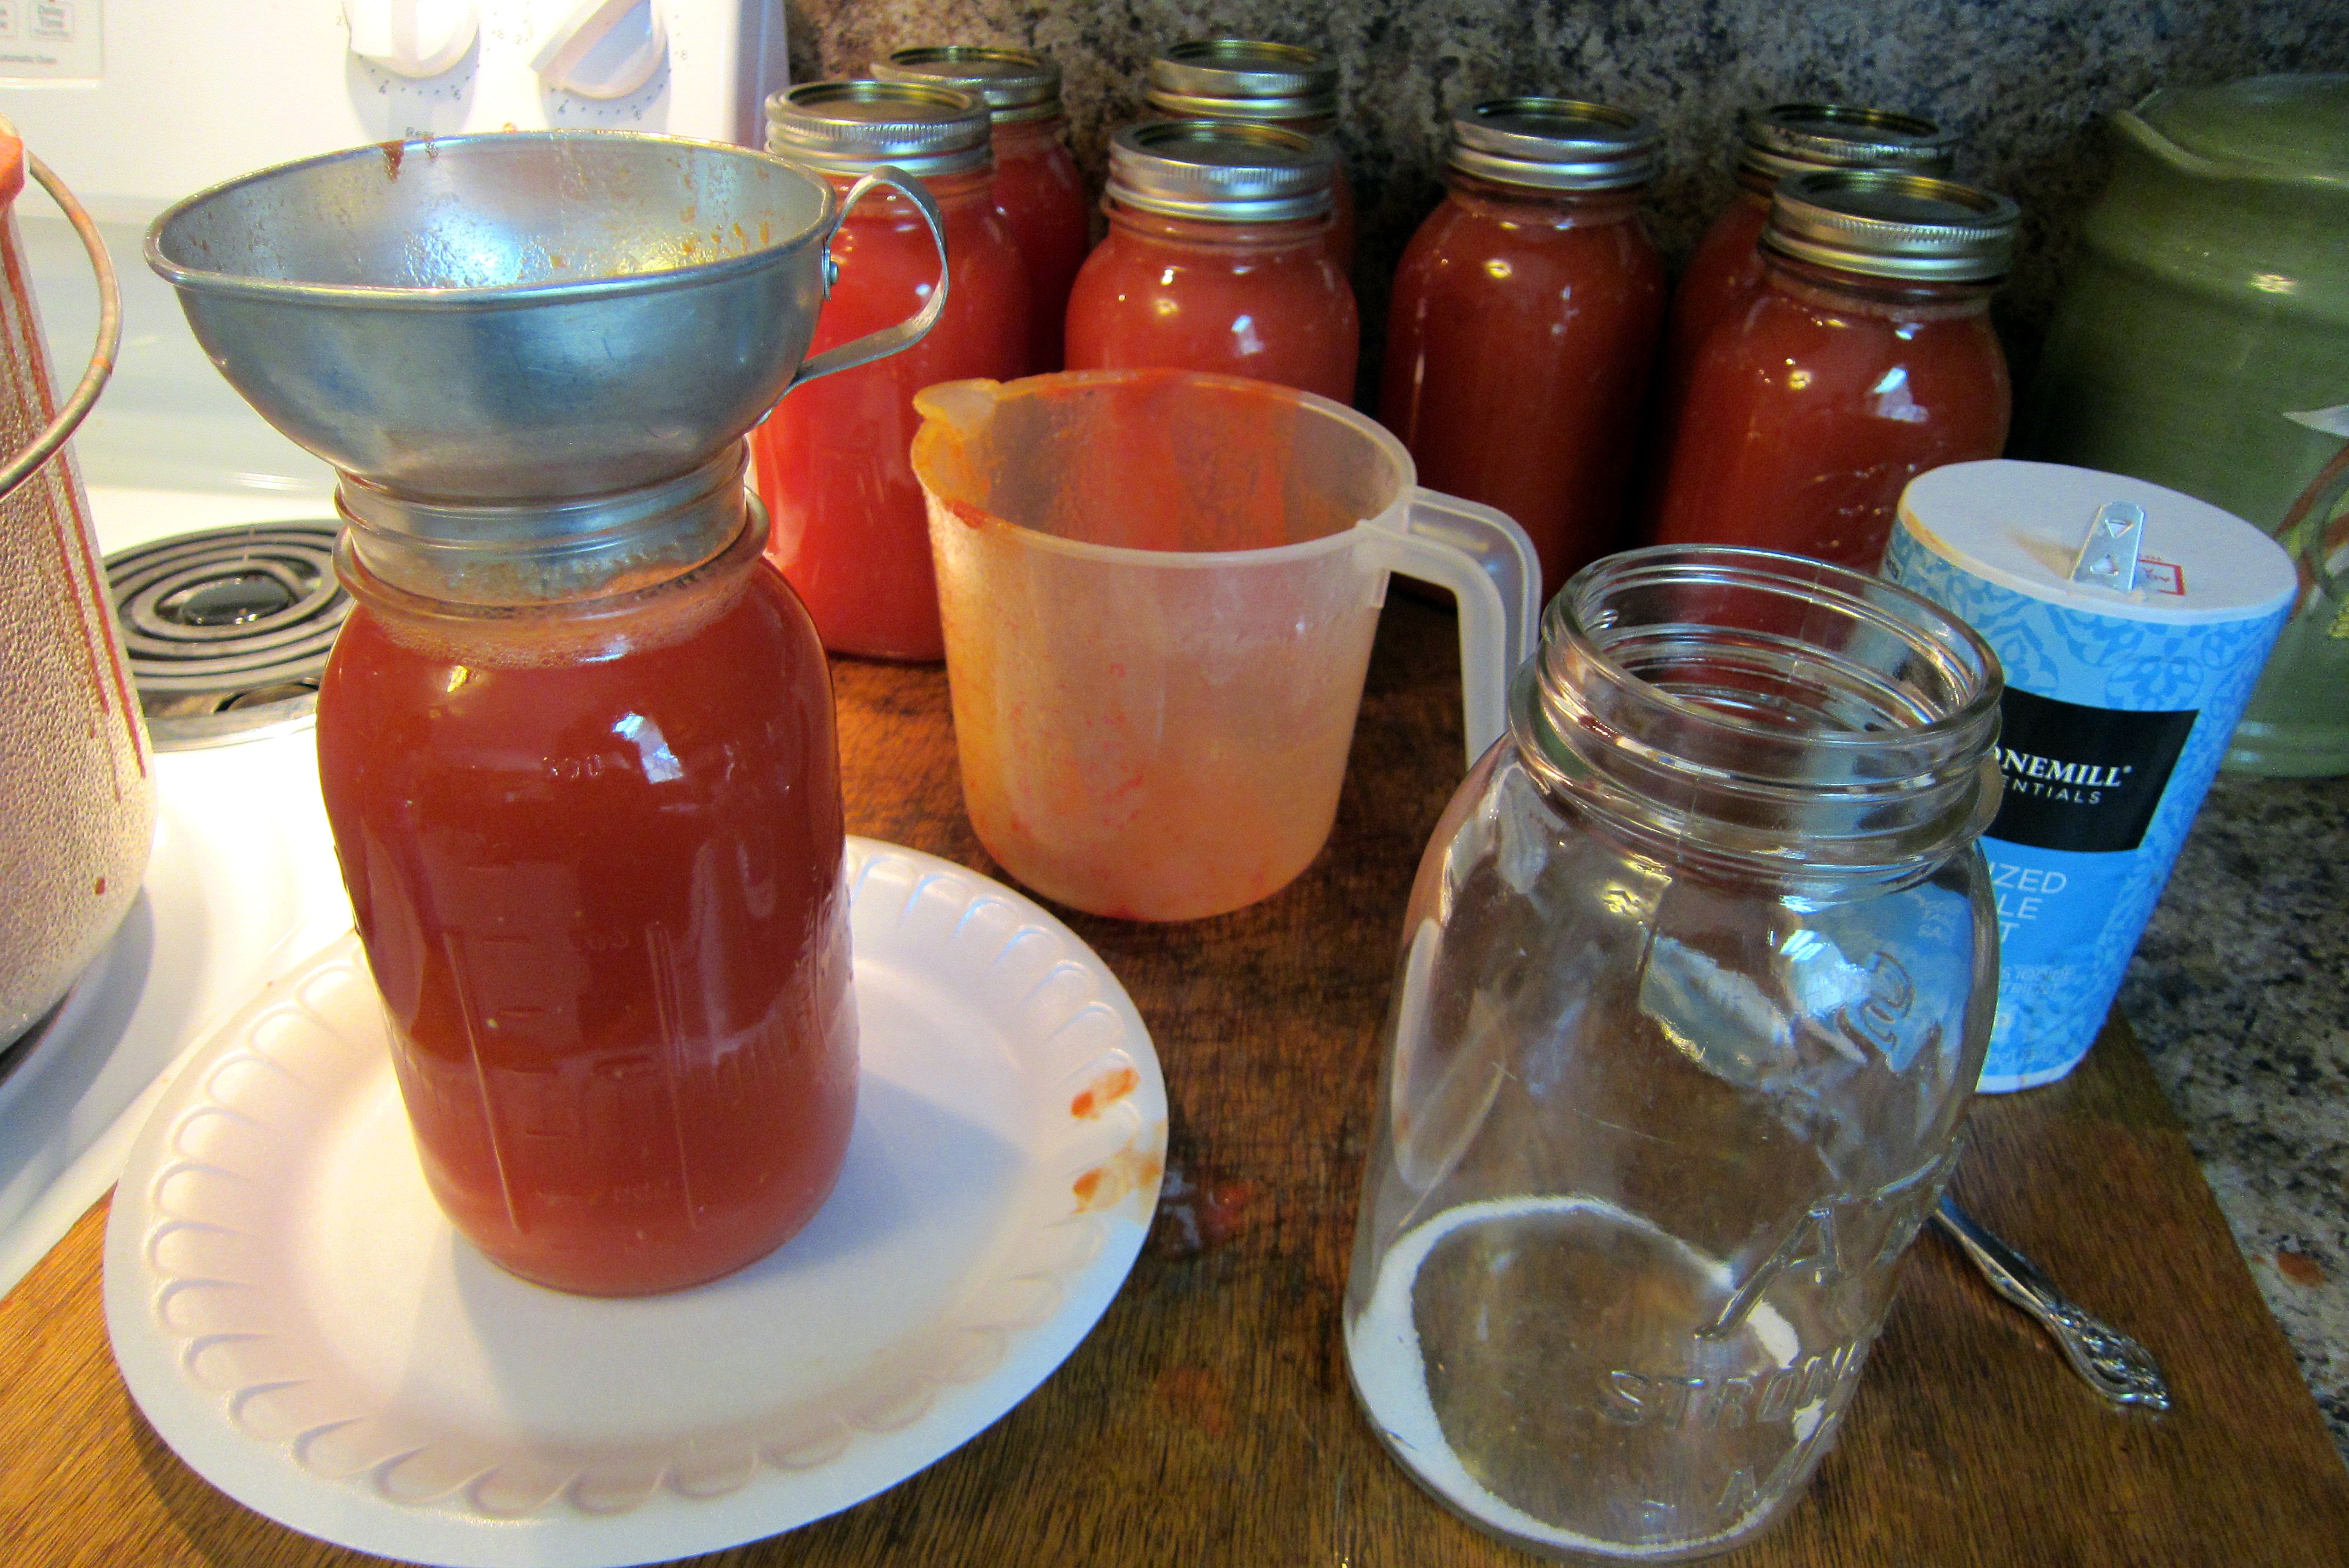
This next step is very important!! Before adding the lid to your jar, wipe the mouth ensuring it’s clean and free from any juice or salt! Debris on the mouth can prevent proper sealing! Is it clean? Are you sure? (family inside joke!) Now you’re ready to add your lids and rings. A helpful tip for tightening the rings is to wrap a damp dish towel around the jar to hold it in place as you tighten the ring as much as you can. Why didn’t I take a photo of this? 🙂 If you have questions on that part, please comment below and I will do my best to paint a clearer picture! Once you’ve repeated this step to complete all jars, you’re done!
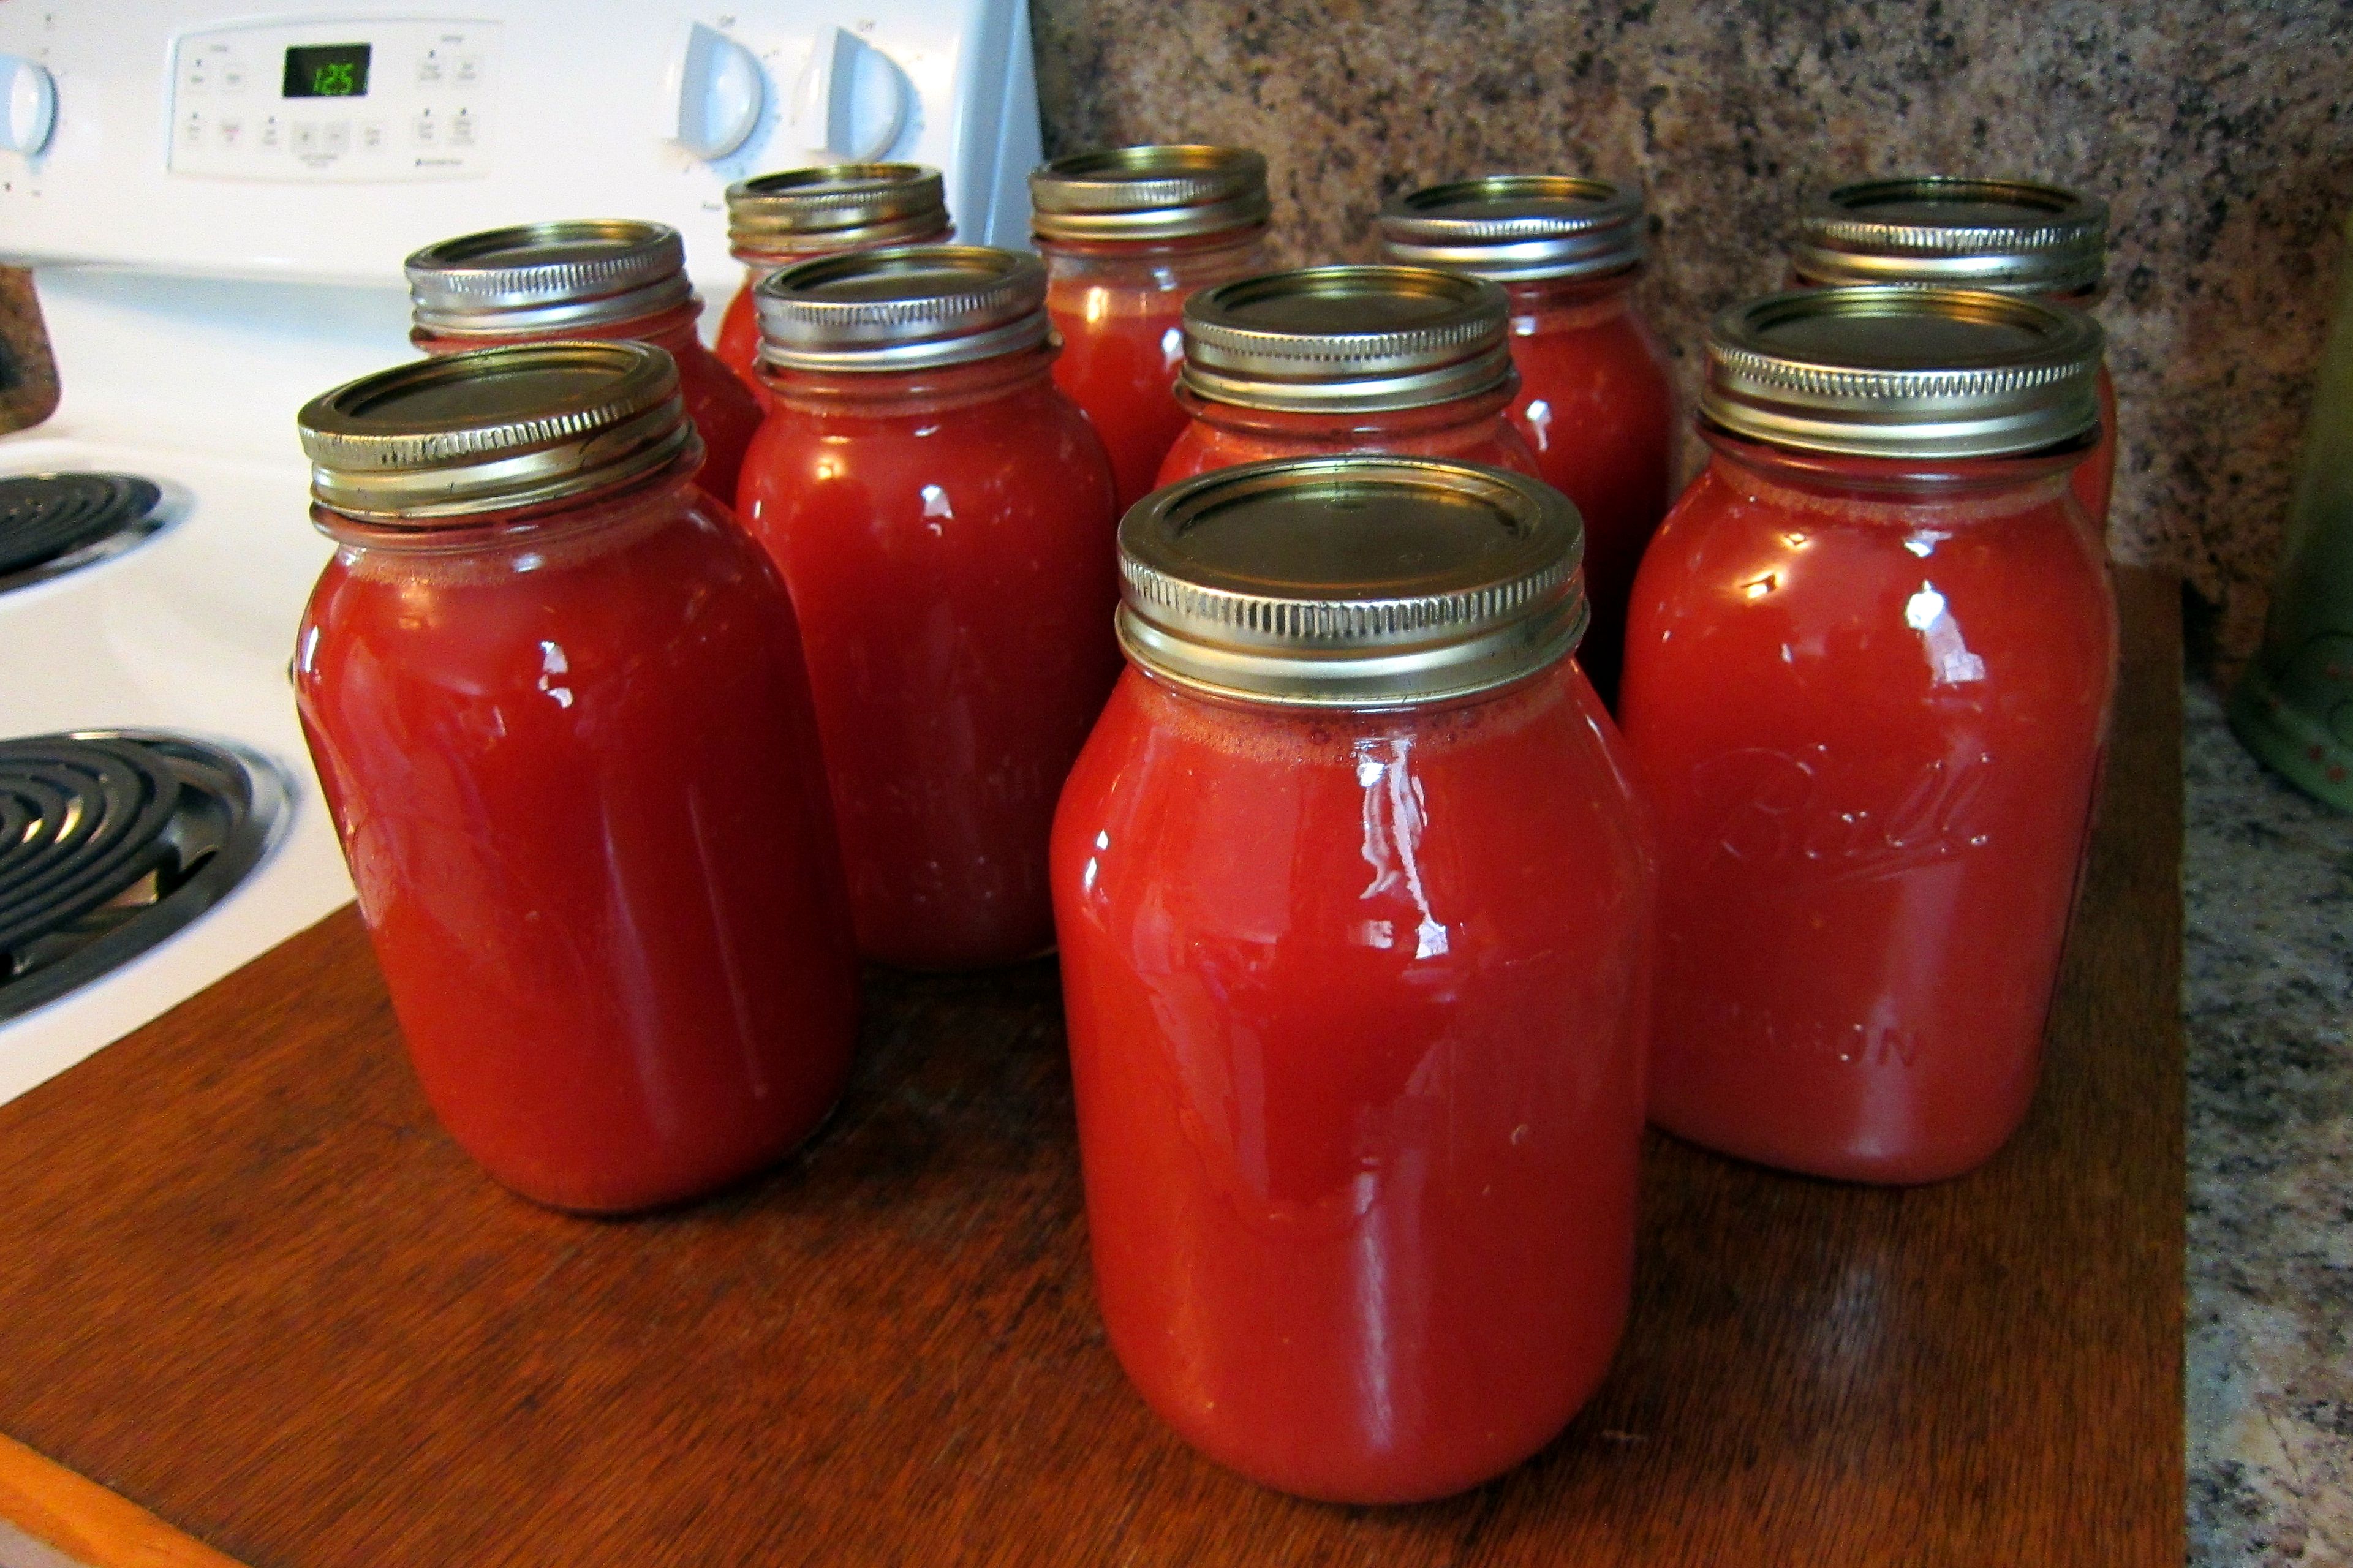
Now just let your jars cool completely and listen for them to pop to let you know the process is fully complete! As a final step, use a permanent marker to add the date to each lid before storing in a cool, dark place. Bonus tip, it’s smart to examine your jars before canning. We had one jar with a crack on the bottom causing all of the tomato juice poured in to begin leaking out at a generous pace! Oye! My Grandma said in all the years she’s been canning that has never happened so I suppose it was just a way to break in the rookie 🙂 As a result, we ended up with 10 quarts of juice instead of 11, but that brought my Grandma’s total to 71 so still pretty good; the goal for the season is 100 quarts!
Some of our favorite ways to use this tomato juice is over stuffed peppers and cabbage rolls or making a simple dish of pasta and tomato juice sprinkled with parmesan cheese! The open kettle canned tomatoes are great to add to chili or hot sauce (a rice dish). For a quick recap, see the steps in a recipe format below. Happy Canning!!
Canned Tomato Juice
Ingredients:
- Tomatoes (number will depend on how many quarts you want to can)
- 1 tsp Salt per jar
Canning Materials:
- 2 large cooking kettles
- 1 medium sized pot
- 1 small saucepan
- 1 strainer with stand and mortar
- Jars, lids and rings
Instructions:
- Wash tomatoes by rinsing or soaking. Slice each tomato in half, remove the core and cut into pieces. Add to large cooking kettle.
- Place the kettle of tomatoes on the stove over high heat allowing the tomatoes to reach a rolling boil. Cook for one and a half hours.
- Remove kettle from the stove. Place strainer and stand in your sink over a medium sized pot. Using a small saucepan, add a manageable amount of cooked tomatoes at a time to the strainer and squeeze out all juice with the mortar moving clockwise around the strainer. Continue motion until tomato is dried out and all juice is strained. Scrape excess off the mortar and repeat the process until the pot is full.
- Pour the strained tomato juice into a new pot on the stove over high heat. Repeat straining process and continue to fill the pot on the stove until all cooked tomatoes have been used.
- Once the tomato juice reaches a rolling boil, cook for 15 minutes occasionally stirring the sauce.
- While the sauce is cooking, heat the oven to 200 degrees and place jars on the rack inside to sterilize for 10-15 minutes. Add lids to a small saucepan of boiling water on the stove to sterilize simultaneously.
- Turn off heat from the stove. Remove 2-4 jars at a time from the oven using pot holders and place on a heat resistant surface for canning.
- Add salt to each jar. Working with one at a time, place a funnel over the mouth of the jar and pour tomato juice filling to the neck of the jar.
- Wipe the mouth of the jar clean to ensure it is free from salt and/or sauce. Add lid and ring. Place a damp towel around the hot jar to hold in place and tighten the ring as much as possible.
- Repeat until all jars are full and allow them to cool completely. Listen for popping over the next half hour to indicate sealing of the jars.
- Once cooled, add a date to each lid and store in a cool, dark place. A pantry or cellar will work.
As always, thanks for reading!!

